We’re delighted to share this month’s latest updates and improvements now available on the Closd platform.
This month, find out how to add one or more witnesses to your signing sessions.
Table of contents:
- What is a witness?
- How does the witness feature work in Closd?
- How do I activate the feature on my account?
What is a witness?
In the United Kingdom, Common Law requires the physical presence of a witness for the signing of certain deeds. Although witnessing is optional in many cases, it is widely used to enhance the confidence and legal certainty of the signature.
While most signed deeds do not require the presence of one or more witnesses, certain specific cases do, such as the signing of power of attorney agreements, share transfer agreements for all types of deals, or more generally, highly sensitive operations.
Faced with the increasing digitization of practices, English law, like many other countries, recognizes electronic signatures as legal. Electronic signatures, as well as electronic witnessing, are admissible and enforceable in a court of law – with a few exceptions (Electronic Communications Act (ECA 2000), derived from the eIDAS regulation after Brexit).
Some e-signature service providers now allow their customers to add witnesses to the signing session, enabling them to sign cross-border deals.
Among them is Closd, a legal project management platform, through DocuSign technology, a Qualified Trusted Service Provider.
How does the witness feature work in Closd?
The use of the witness feature in Closd requires several conditions:
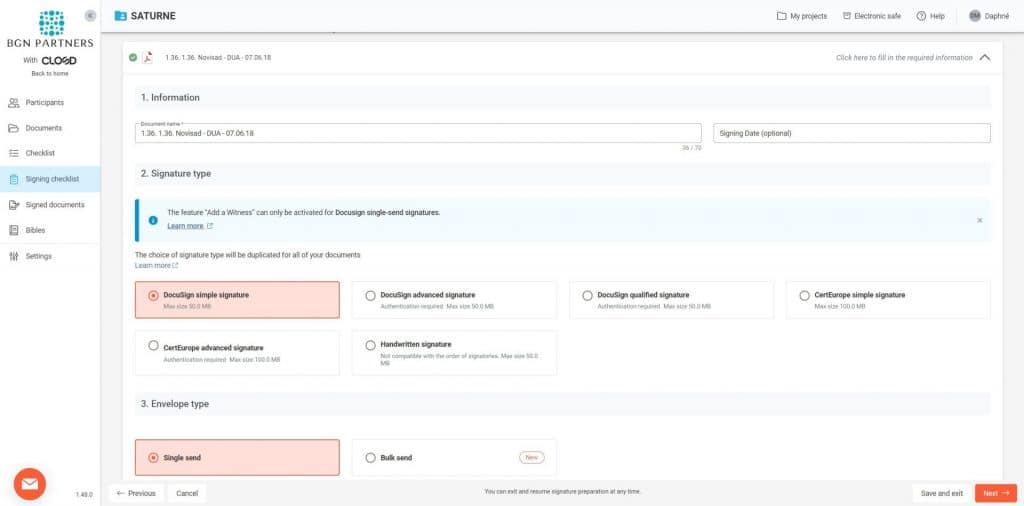
- It only works with simple signature.
- It only works with the Docusign electronic signature provider.
- It only works on single-send signatures (however, it is compatible with document grouping).
To use this new feature, Project Managers should first request its activation in their subscription, and then go to the Signing Checklist area of the platform.
Choose your document to be signed, then in the Settings, select the “DocuSign Simple Signature” signature type, and the “Single Send” envelope type.

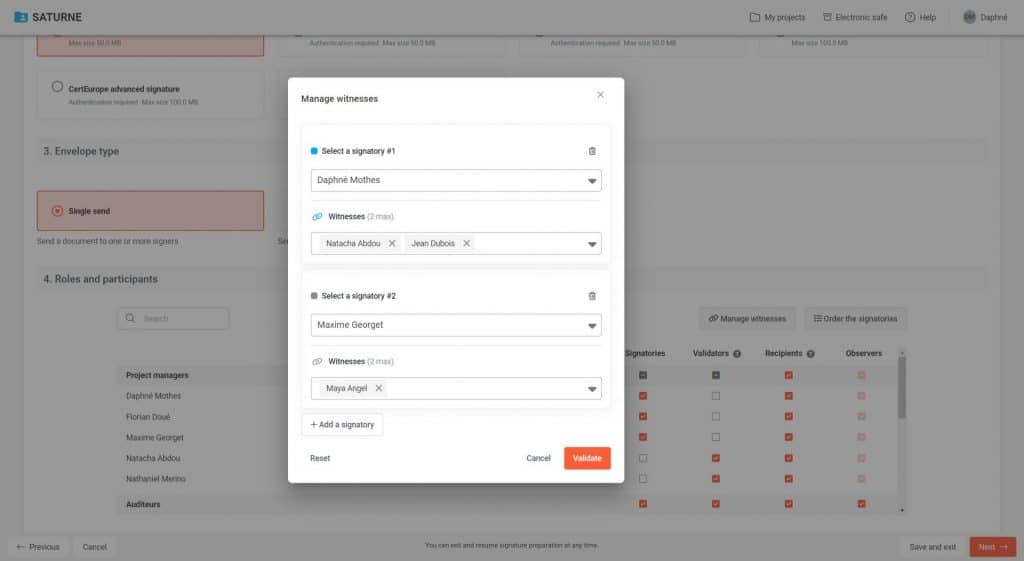
Then select at least one signatory in the Roles and participants section to activate the new Manage witnesses button.

Once the signatories have been selected, click on the button. A pop-up window will appear.
This allows you to choose the witnesses for each of the selected signatories. You can define up to 2 witnesses per signatory. Note that it is not mandatory to assign a witness to all signatories.

Once you’ve chosen your witnesses, confirm your choice. A new Witnesses column will appear in the Roles and participants area. Once you’ve completed your settings, click on the Next button.
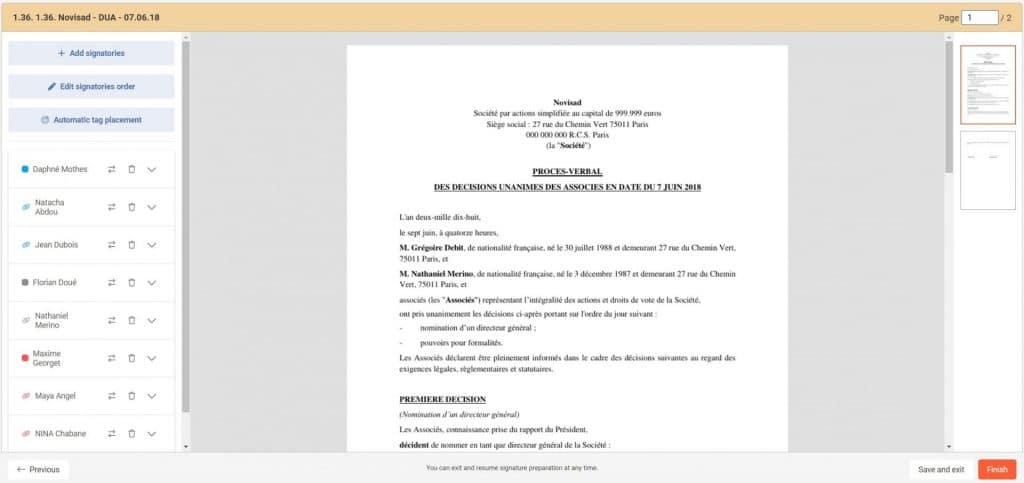
For the final step, place your signature tags as usual.
A new type of tag dedicated to the various witnesses is now available. Each witness is linked to its signatory by a color code.

Once the tags have been placed, you can start your signing session. Signatories will receive an email inviting them to sign on the platform. Once the signatures have been finalized, the witnesses will then be invited to countersign the document.
How do I activate the feature on my account?
This feature is available at no extra cost to all Closd users. To request activation, please contact your account manager or our team: support@closd.com
To find out more about this feature, contact our team for a free demo of the solution, or sign up for our newsletter to stay in touch with our updates!


